Hemming a Curved Edge
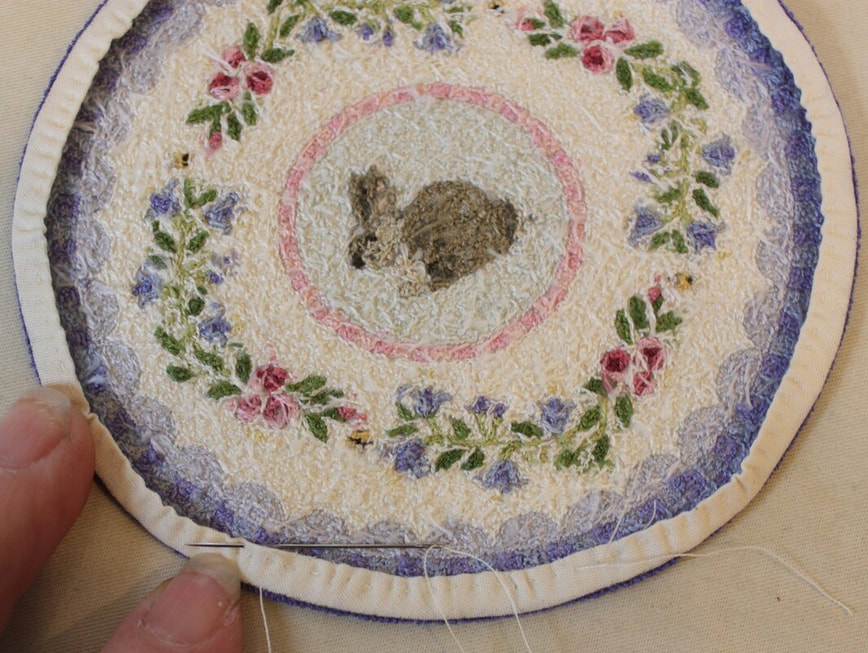
All photos show the back side of the piece and how the hem is turned to the back.
Washing and Ironing:
1. Hand wash your piece with a little laundry soap to remove any accumulated hand oils or dirt, rinse well, and roll it in a towel to damp dry.
Note: if you used any hand-dyed threads (some of my kits have these), and didn't rinse them to remove the extra dye before you stitched with them, they may not be colorfast, particularly the darker colors. These threads may bleed if they get wet, even from a spritzer bottle used for ironing. Unfortunately, it may be better to NOT wash your piece and put a note with it for future generations.
2. To hem the edges of your stitched piece, first press the fabric around the stitched part. Do not press your knotwork piece from the front as you may flatten the knots. To press the piece itself, place it face down on a towel, use very gentle pressure and let the heat do most of the work.
3. Use a ruler to measure 3/8” out from the edge of the stitching. Using a pencil to draw little marks about 1/4" apart all the way around the design. Then, using the pencil connect the dashed line around the stitched design to make a complete circle or partial curve (depending on your design shape).
4. Carefully cut away the extra fabric on the pencil line, leaving a 3/8" hemming allowance.
|
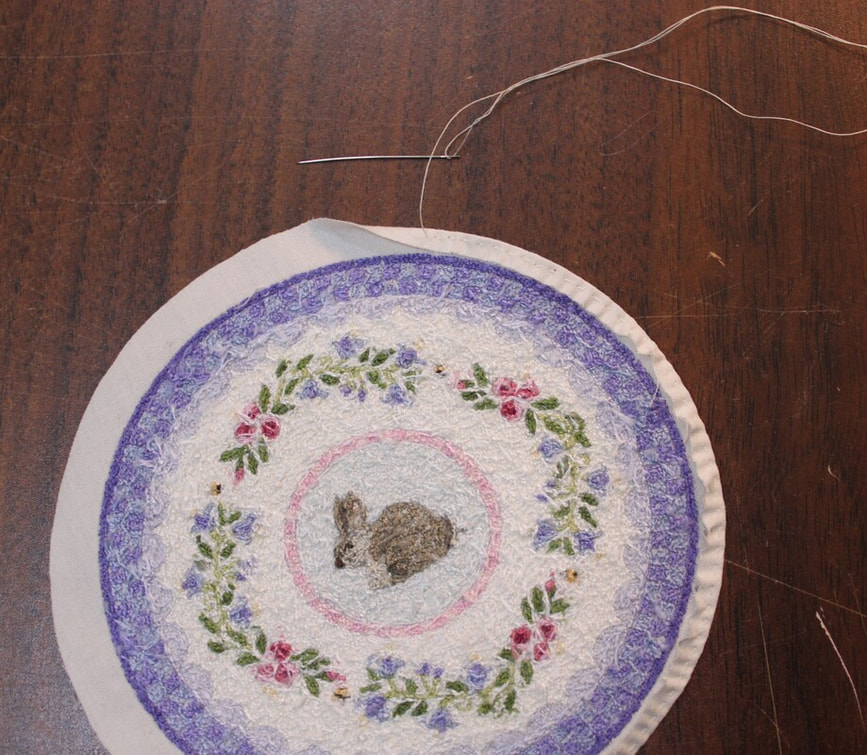
5. Thread a needle with regular thread (ivory or white works well) and put a knot in the thread about 2” from the cut end. Leave that 2” attached for easy thread manipulation and removal later. 6. Beginning anywhere you like on the circle, fold the muslin edge in half, to the back of the work, so the cut edge is just shy of touching the outer edge of the stitched area. NOTE: The reason the little gathers form is because the circumference of the outer cut edge of a circle is longer than the circumference of the edge of the stitched design. So, all of that has to be accommodated while you are turning the hem inwards. |
|
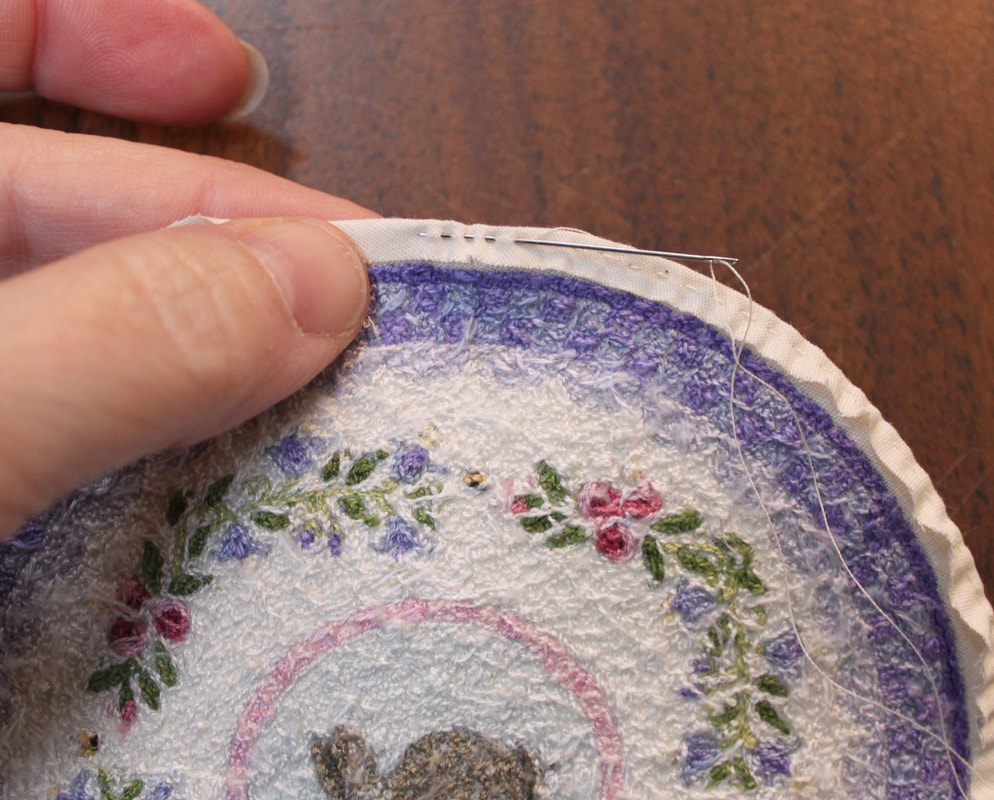
7. Take a stitch into both layers of the muslin about 1/16” (or a third of the allowance) to begin holding it in place. These stitches should be about 1/8” long on each side (front and back). I usually put 5 or 6 stitches on the needle before pulling it through. There is no need to be obsessive about these stitches, as they will be removed later. But the more uniform they are, the more even your little gathers will be. 8. Continue folding the curved allowance and stitching it in place, with a simple running stitch, until you work your way around the whole circle. DO NOT take any back-stitches as you will need to pull up the thread you are stitching in to ease the extra fabric into the curve and the fabric must be free to move on the thread. |
|
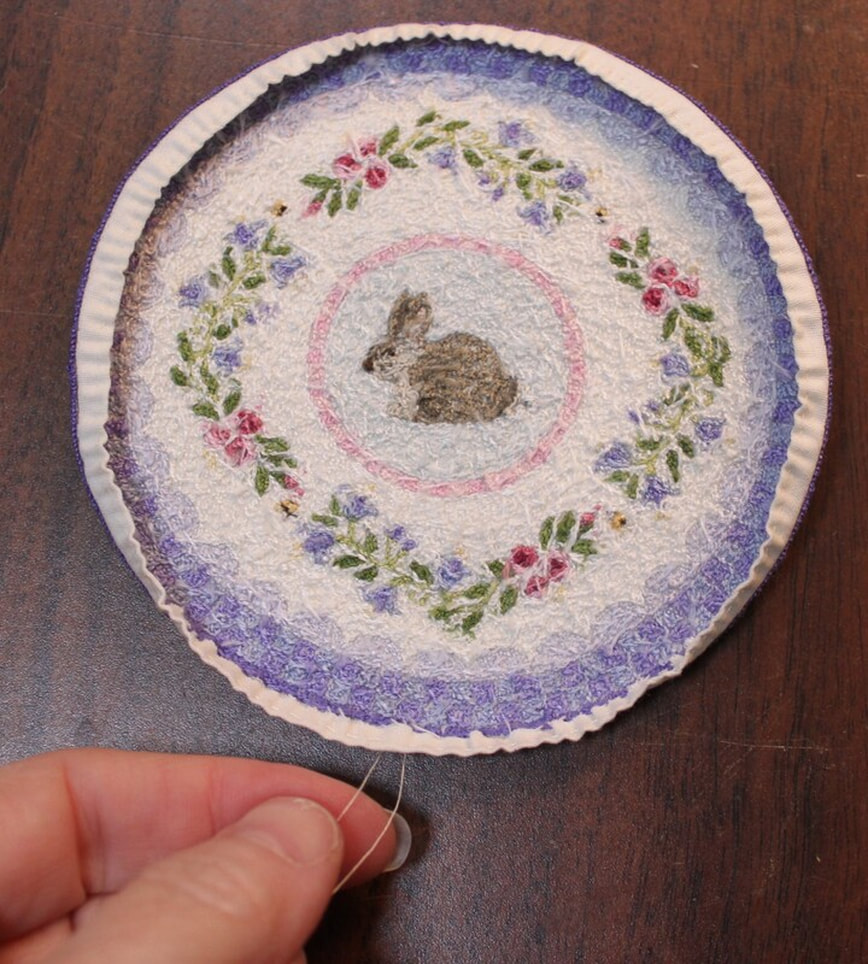
9. Once you have finished stitching down the folded edge, remove the needle from the thread, leaving a tail you can get a good hold on. 10. Holding one end of the gathering thread, gently pull up a small gather around about half of the circle. It doesn't take a lot, but you have to move the gathers along the thread to adjust them. As you do this, the folded edge will roll to the inside and hide the cut edge of the fabric into a double rolled hem. I work from each end of the thread towards the middle as I do this step, it makes it easier to adjust the little gathers in the fabric. NOTE: I find that it works best, when I pull each of these threads, holding it so the thread is in line (as much as possible) with the direction the thread is stitched in, . By that I mean it should NOT be 90 degrees from the direction of stitches, as it looks in the photo. I pulled the left thread to the right; and the right thread to the left. (This was a photo I had to take myself - camera in one hand and thread in the other... didn't show it quite right) |
|
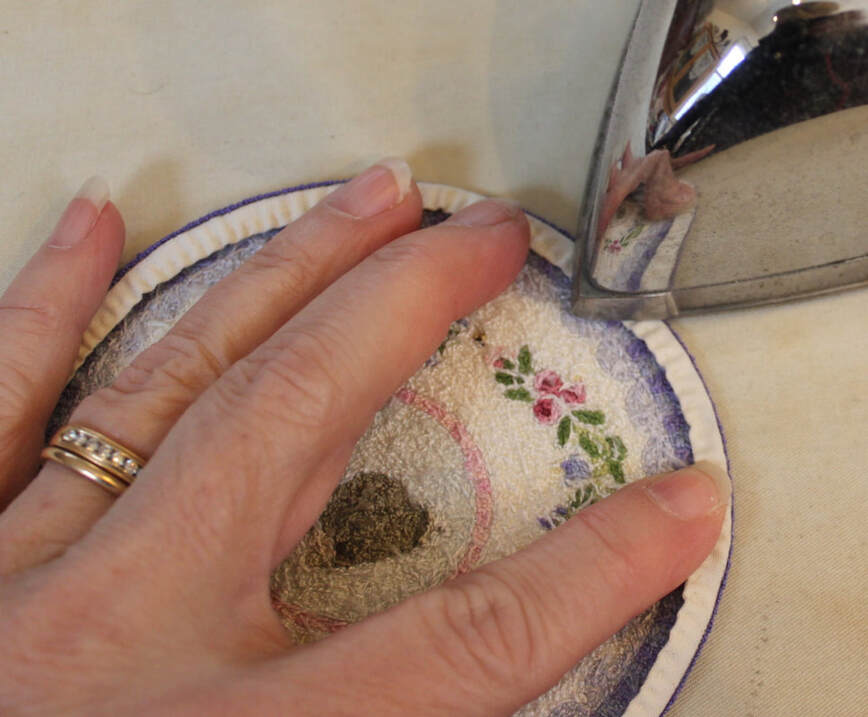
11. Adjust the amount of ‘pull’ and the gathers that are formed, so the very edge (where the fabric is folded at the outer perimeter of the stitching) is smooth, and the outermost French knots of the design are just visible past the fold, the rug should lay flat, and all the raw edges are encased. If you have too much pull, it will start to dome and won't lay flat. 12. Once they are smooth, you can press the folded edges gently in place. Be very careful not to burn your fingers as they will be close to the iron. There will be tiny gathers to the inner folded edge, but if evenly distributed, they won’t interfere with the rug being nice and flat. It is during this step that you want to make sure the knots on the front are just visible around the edge as you press the hem in place. |
|
13. Stitch the folded edge of the hem to the little embroidery threads on the back of the rug. Do not run the stitches through, to the front of the fabric, or they will show on the front. Work your way back around to your starting point, then tie off your hemming thread. 14. Once the hem is sewn down, you can remove the original gathering thread from the fold. 15. Voila!! Nice work!! |