Helpful Hints
Miniature Knotwork

Preparing to Stitch
Good things to know
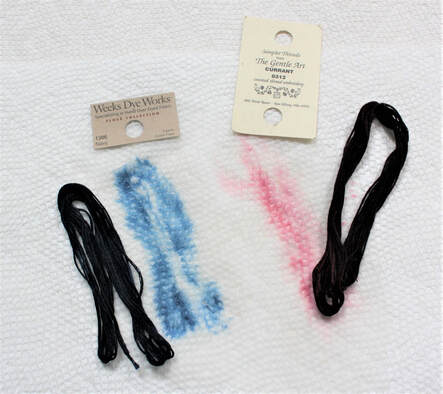
Colorfastness of flosses
If your design uses any of the beautiful colors of hand-dyed, or over-dyed threads (some of my kits have these), remember they may not be colorfast, particularly the darker colors. These threads may bleed if they get wet, even from a spritzer bottle used for ironing.
Rinsing these threads until they no longer leave color on a white paper towel, and letting them dry is always a good idea. You don't want your deep blue night sky to bleed into your pale yellow stars when the finished piece is washed (ask me how I know). These flosses are beautiful, and lovely to stitch with, and gorgeous in your project, but they do require extra care.
Hoop Choices
Use a hoop that is large enough to accommodate the entire design without having to move the fabric to stitch the corners. If you use a hoop that is too small, you will end up with some crushed knots on the corners because they will get pinched in the hoop.
Sometimes on larger pieces, I will use a smaller hoop to stitch as much of the center of the design as I can, because it's more comfortable in my hand. Then I move the partially stitched piece to a larger hoop to work the outer areas.
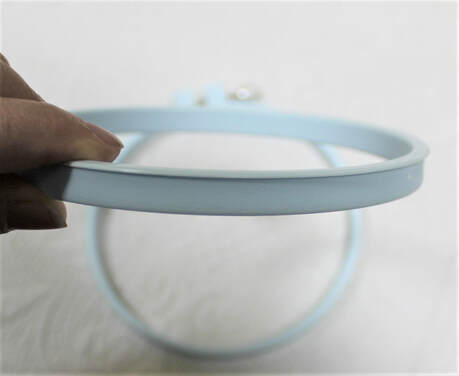
If you are using a Susan Bates hoop, it has a lip on the upper edge of the inner ring. This lip is the mechanism which holds the fabric firmly in the hoop. This is my recommendation for a hoop for this kind of work, because it has worked well for me for over 20 years.
To hoop your fabric:
1. Place the inner ring on your work surface, lipped side up.
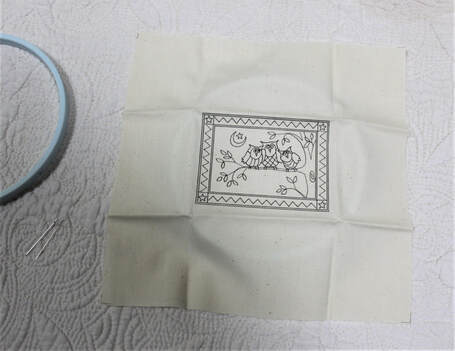
2. Lay the knotwork fabric, design side up, centering the design over the inner ring.

3. Open the outer ring of the hoop as far as possible, without removing the tightening nut.
4. Slip the outer ring onto the fabric and inner hoop while situating the tightening nut on a corner of the design ( doing this will use the bias of the fabric to your advantage). This puts less tension on both the warp and weft of the fabric, and lets the fabric and design remain more square in the hoop.
If you put the tightening nut at the top, bottom or either side (not on the bias), it will distort the design.
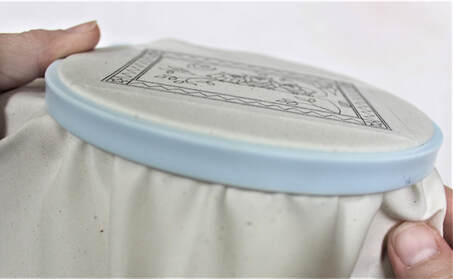
5. Begin to tighten the nut, making sure the lip of the fabric-covered inner hoop has popped out over the top edge of the outer hoop, all the way around, which locks the fabric into place.
6.Continue tightening the nut until it is very snug, pulling at the sides of the fabric to make it taut, and keeping it centered as you go. Make it "drum" tight.
Now you're ready to stitch!
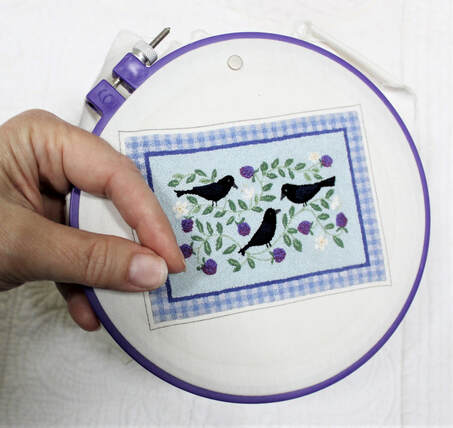
Holding the hoop
I hold the hoop by resting it on my middle finger. This allows me to use my index finger and thumb (which are above the work) to help manipulate the thread on the front of the fabric. At the same time the rest of my fingers are below the work to feel for knots and loops, which sometimes occur.
If you have a hard time holding the hoop this way, you may be more comfortable placing it on a table or putting it into a hoop clamp which will hold it for you, and will allow you to use both hands to manipulate the thread.
Stitching
- French knots have only ONE wrap for this kind of embroidery, otherwise they will be too big to get the details we're stitching.
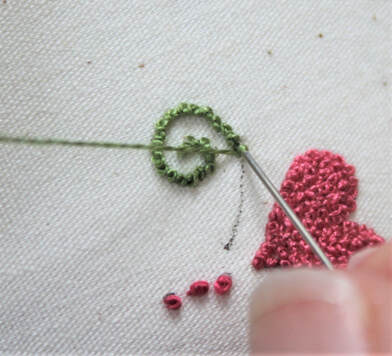
- In miniature knotwork, always work the details first (single stitch dots and fine lines) and then fill in around them, otherwise it will be nearly impossible to find them in the dense pack of stitches.
- If you are unfamiliar with how to form the stitches, use the stitch diagrams in the kit; or the photo step-by-step stitch tutorials here for making stitches, both right-handed and left-handed.
- You can practice making stitches outside the design area on the hooped fabric until you feel comfortable with the process.
|
Remember to always tighten each stitch around the needle and onto the surface of the fabric before pulling the needle through to finish the stitch or you will end up with various size loops on the front surface of your piece. Occasionally, a loop will develop on the front of your work. If you can't remove the loop, and it's small, you can just make the next few stitches on top of it to "nail it down." If the loop is larger than you think you can hide in the stitch pack, then, just cut it off at the fabric surface and begin stitching again. Every stitch is a knot, they won't come out. |
|
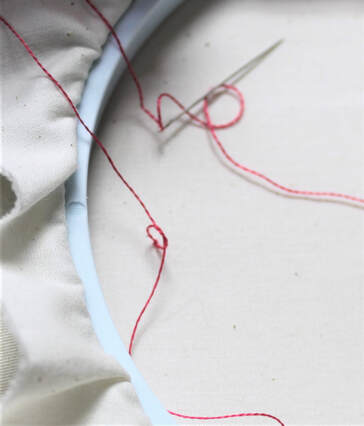
Keeping loops at bay Sometimes, when you are using a new length of floss, it twists into loops/knots as you pull it through the fabric, both front and back. On the front, as you pull the needle to the back, you can place your thumb (the one holding the hoop) gently over the thread as it enters the fabric. On the back, as you pull the needle up to the front, you can use your fingers to feel the thread as it pulls through to stop the loops before they get tight. These small actions will help stop the thread from twisting as much as it goes through the fabric and help you avoid most of those knots. |
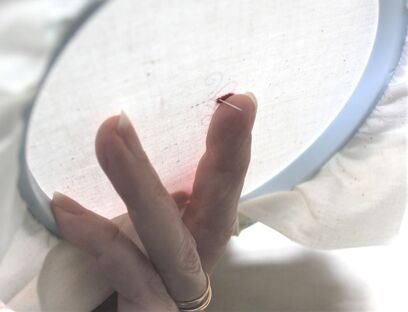
Keeping the back neat
Use the fingers of your hoop-holding hand, which are under the hoop, to feel the back of the stitching as you work each stitch to make sure there are no unwanted knots or loops (see above). If you take care of them as they happen, the back will be nice and neat, and help the finished piece lay flat.
Here again, if you end up with a loop or bird's nest on the back, you can simply cut it off at the fabric surface and begin again. This is a very forgiving kind of stitching.
This is why the 5-inch hoop is my favorite... my fingers can reach the center of it.
Stitching on a line
When you are working on the lines of a design, be very careful to bring the needle up precisely on the line about a needle’s width (1mm) from the last stitch.
After forming the knot on the needle, take the needle back down precisely into the line so the needle tip is touching the last stitch. These stitches, more than any others, need to be very close together to achieve a line rather than a series of dots when the background color stitches are added.
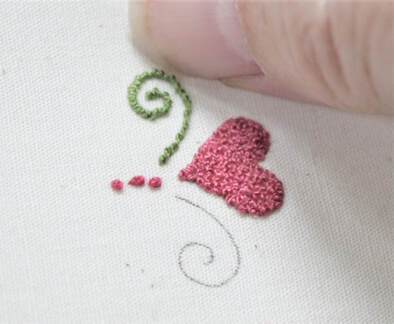
When you are stitching on a line, and those stitches look like they aren't even, it's because they are closely placed and vying for space. They may even look like they alternate left and right.
You can use the tip of your fingernail to smooth them back into place. As long as you placed your stitches on the line they will be perfect. The knots you put in later to fill the background will hold them all in place, just like your fingernail did.
Stitching to fill in spaces
As a general rule, I have always used French knots to fill in the spaces of the design elements (creatures, flowers, etc.) because they are the smallest knot I can make, which means I can get more detail into the design. When I started this journey, I would fill in the backgrounds using Colonial knots because they are a larger knot and would fill in the larger spaces a bit faster. But... I love the smooth, even texture when I use French knots for the background as well, so I've traded a faster technique for more consistent finish, and now I use French knots for the entire design.
As a general rule, I have always used French knots to fill in the spaces of the design elements (creatures, flowers, etc.) because they are the smallest knot I can make, which means I can get more detail into the design. When I started this journey, I would fill in the backgrounds using Colonial knots because they are a larger knot and would fill in the larger spaces a bit faster. But... I love the smooth, even texture when I use French knots for the background as well, so I've traded a faster technique for more consistent finish, and now I use French knots for the entire design.
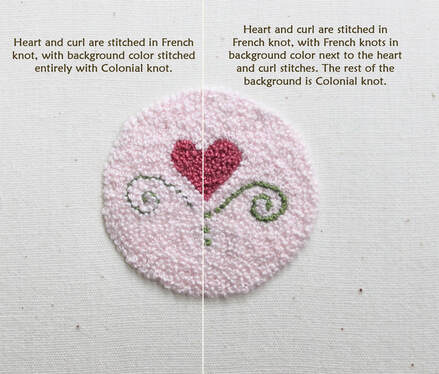
If you decide to use Colonial knots to fill in your backgrounds and borders, there is one important tip I can offer. The Colonial knot is twice the size of a French knot. This means that where the background meets the design element, the larger Colonial knots can infringe on the French knots, and actually cover a bit of their edges, which changes the look of the design.
To avoid this, stitch a line of French knots, using the background color, around the design element to buffer size difference where these colors meet. This way, the background color will come to the edge of the design element without covering it in any way.
This photo shows the difference.

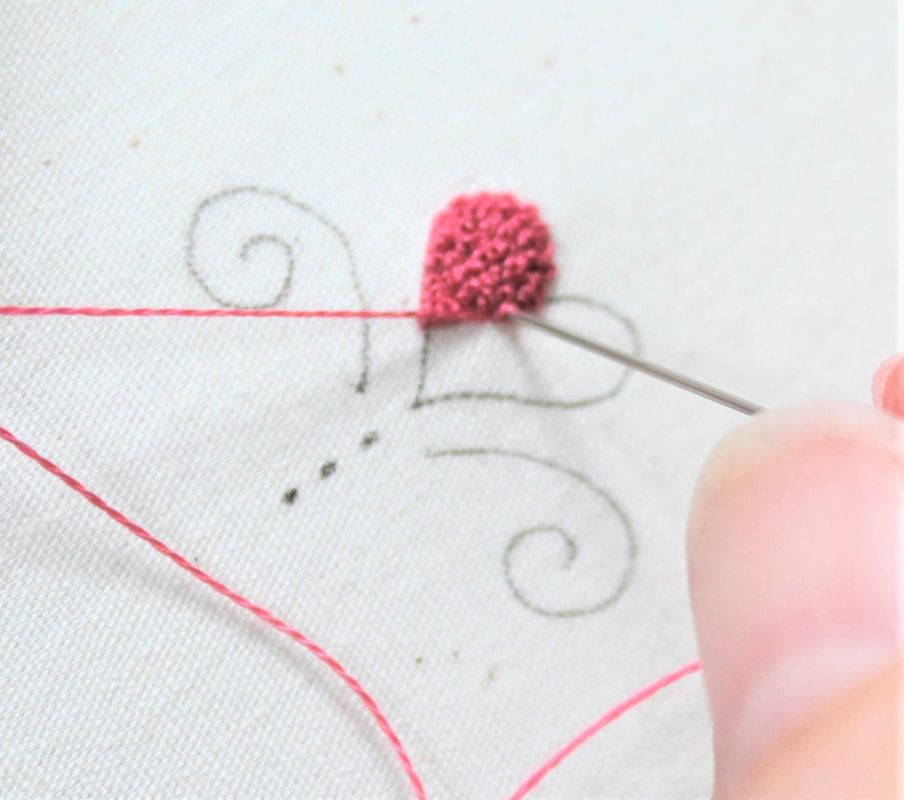
Stitch density
To get the stitches close enough together to achieve the tiny “hooked rug” texture, use the stitching-by-Braille method. You can feel with the tip of the needle where you are. For each stitch, slide the needle tip up to, or even slightly under, the previous stitches before finishing your knot. If the needle tip is touching those stitches, you know the knot will be snugly in place when you form it.
If you are concerned about your stitch density and uniformity, hold your work up to a light. It will show you where your stitches are more and less densely packed. You can always go back and fill in the less densely packed areas.
In this photo, with a light shining from behind, you can see the left side of the heart is more densely stitched than the right side.
Ending a thread
To end a thread, run it under some of the threads on the back side of the piece and snip it off.
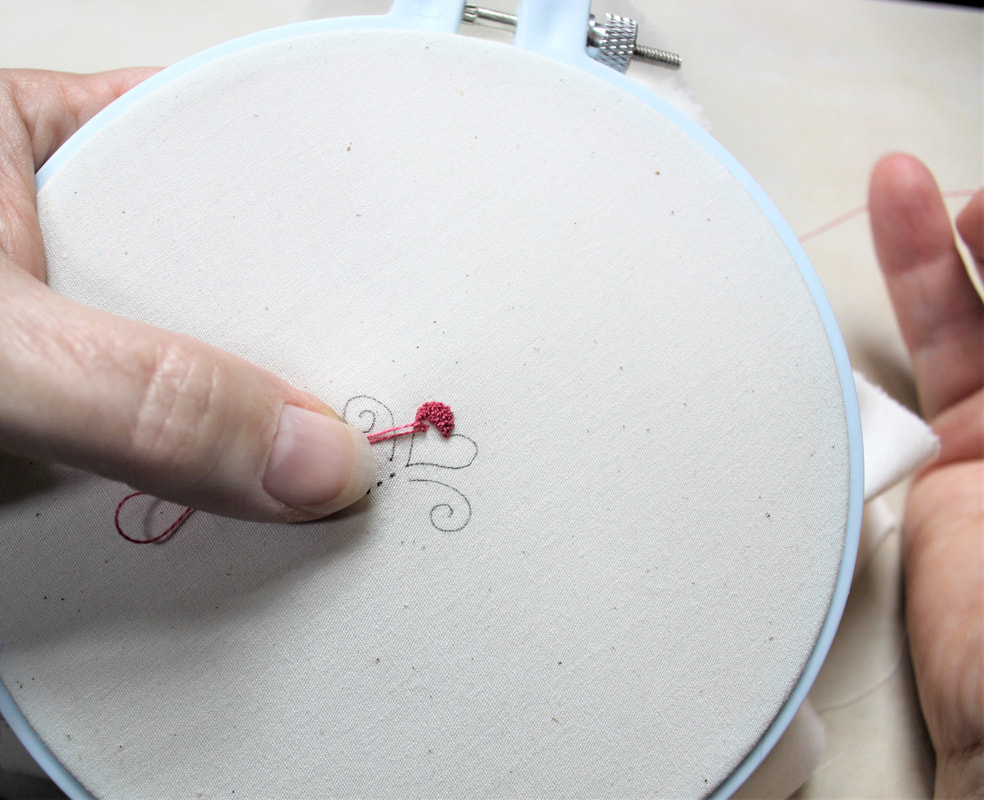
Single knot details
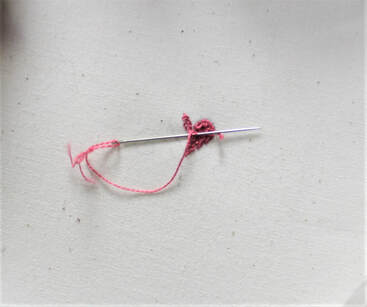
When stitching single knot details such as eyes, there is usually nowhere to end the thread on the back of the fabric, because that is the first stitch in that area. To make the job easier, leave a 4˝ tail of thread on the back of the fabric so you can just tie off the threads after you make the stitch on the front. Once you have tied off, snip the thread tails to about 1/4˝ and those ends will be automatically tacked to the back as you fill in the design with more stitches.
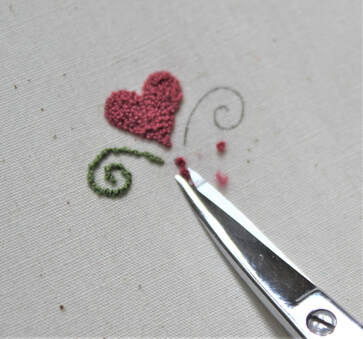
In this photo, I'm tying off on the back after making one French knot on the front.
As an alternate method, you can just take a tiny back-stitch to begin and end a thread. It will get lost and tacked down in the stitches to follow.
Removing stitches
If, at any time, you wish to remove stitches, you will need a sharp pair of small, curved-blade scissors. These are the best tool for the job. Carefully slide the tip under the base of a knot and snip it off. Be very careful not to cut through the fabric. This is a time consuming job… and it takes longer to remove the stitches than it does to stitch them in the first place.
If you do cut through the fabric while removing stitches, you can remedy it by ironing a small piece of lightweight fusible interfacing to the back of the piece before re-stitching that spot.
Problems that may arise
Knots in the thread…
The knots that form in the thread while you are stitching are usually one of two kinds. Either a slip knot caused by a twist in the thread as you pull the stitch through or a knot where the free end of the tread has wrapped itself around the working part of the thread.
Slip knots can usually be removed if you gently run your finger over it to loosen and release it. Sometimes you must slip the needle tip into the loop it has formed and give a tug on the thread below the knot to get it to release. The main principle for removing these is to be gentle with them.
End-of-the-thread knots can usually be removed by un-looping the end of the thread from around the working part of the thread. If the knotted end of the thread is frayed and it’s hard to determine how it’s wrapped around, try sliding it up and down the working thread to determine how it is caught. If you can get it to slide you can cut it off very close to the working part of the thread and pull the fuzzy end off.
With either unwanted knot situation gentle is the key. If indeed your unwanted knot remains unyielding, then simply cut it off at the fabric surface and begin again. The last stitch you made was a knot, so it’s a safe bet it will stay put.